
The most important step before crawl space encapsulation is identifying and correcting existing moisture, drainage, pest, or structural issues. Encapsulation works best when the crawl space is clean, dry, and free of underlying problems that could become trapped beneath the vapor barrier. Proper preparation helps maximize the system’s effectiveness, improve indoor air quality, and protect your home’s foundation for years to come.
Why Preparation Matters Before Crawl Space Encapsulation
Encapsulation is designed to seal the crawl space from outside moisture and humidity. If water intrusion, mold, wood rot, or drainage issues already exist, sealing the crawl space without correcting them may trap those problems inside.
When considering crawl space encapsulation in Richmond, VA, preparation is just as important as the encapsulation itself. A thorough inspection allows professionals to identify conditions that could affect the longevity and performance of the system.
Preparing the crawl space helps:
- Prevent moisture from becoming trapped beneath the vapor barrier.
- Reduce the risk of mold and mildew growth.
- Protect wooden framing from rot.
- Improve indoor air quality.
- Increase the effectiveness of humidity control.
- Extend the lifespan of the encapsulation system.
Taking the time to prepare the space creates a stable environment where encapsulation can perform as intended.
Schedule a Comprehensive Crawl Space Inspection
A professional inspection is the first step before any encapsulation project begins. Not every crawl space has the same conditions, so identifying existing concerns allows contractors to recommend the most appropriate solution.
During an inspection, professionals typically evaluate:
- Standing water
- Signs of previous flooding
- Foundation cracks
- Moisture levels
- Existing insulation
- Ventilation conditions
- Drainage performance
- Mold or mildew
- Wood deterioration
- Pest activity
A homeowner in The Fan may discover that what appears to be a simple humidity issue is actually the result of poor exterior drainage directing water beneath the home. Identifying the source early helps prevent future problems after encapsulation.
Eliminate Standing Water and Moisture Sources
Encapsulation should never begin while water is actively entering the crawl space.
Standing water often indicates drainage problems that need immediate attention. Possible causes include:
- Poor grading around the foundation
- Clogged gutters
- Improper downspout placement
- High groundwater levels
- Plumbing leaks
- Drainage system failures
Removing existing moisture before encapsulation reduces the likelihood of mold growth and protects the vapor barrier from unnecessary stress.
Depending on the situation, professionals may recommend drainage improvements, French drains, or sump pump installation before sealing the crawl space.
Repair Foundation and Structural Damage
A crawl space should be structurally sound before encapsulation begins.
Inspecting for structural issues helps ensure that the encapsulation system protects a stable foundation rather than concealing existing damage.
Areas commonly evaluated include:
- Foundation cracks
- Settlement damage
- Sagging floor joists
- Damaged support beams
- Rotten sill plates
- Loose masonry
Ignoring these issues before encapsulation can allow deterioration to continue unnoticed.
Professional repairs completed beforehand help preserve the home’s long-term structural stability while improving the effectiveness of crawl space encapsulation in Richmond.
Remove Mold and Damaged Materials
Moisture often creates the ideal conditions for mold, mildew, and deteriorated insulation.
Before installing a vapor barrier, damaged materials should be removed, and any mold growth should be properly addressed.
This preparation may include:
- Removing wet insulation
- Cleaning mold-affected surfaces
- Replacing damaged vapor barriers
- Disposing of water-damaged debris
- Sanitizing affected areas
Completing these steps beforehand helps improve indoor air quality and prevents contaminants from remaining sealed inside the crawl space.
For example, a homeowner in Church Hill may notice musty odors inside the home that originate from mold growth beneath the flooring. Addressing the issue before encapsulation creates a cleaner and healthier environment throughout the house.
Address Pest Infestations Before Sealing the Crawl Space
Rodents, termites, ants, and other pests frequently occupy damp crawl spaces.
Encapsulation should only begin after active infestations have been eliminated.
Pests can:
- Damage insulation
- Chew wiring
- Destroy wooden framing
- Contaminate the crawl space
- Compromise vapor barriers
A professional inspection ensures that any infestation is resolved before the crawl space is sealed, preventing future damage and reducing the risk of recurring problems.
Evaluate Drainage and Water Management Systems
Proper drainage helps crawl space encapsulation perform effectively over the long term. Professionals typically evaluate:
- Exterior grading: Ensures water drains away from the foundation.
- Gutters and downspouts: Direct rainwater away from the home.
- Interior drainage: Controls groundwater beneath the crawl space.
- Sump pump: Recommended where groundwater intrusion is a concern.
Check Ventilation and Humidity Levels
Older homes often rely on traditional crawl space vents to manage moisture. However, outside air can introduce additional humidity, especially during warm, humid seasons.
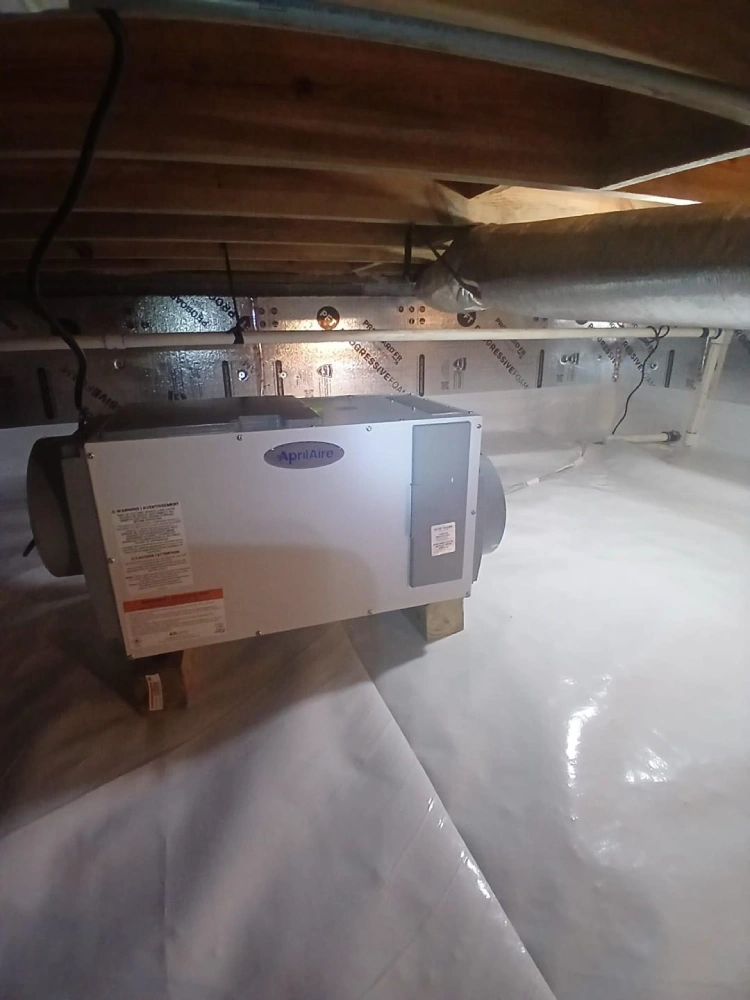
Before encapsulation begins, professionals measure humidity levels to determine whether additional moisture control measures, such as a dehumidifier, should be included in the system.
Maintaining proper humidity after encapsulation helps:
- Reduce condensation
- Prevent mold growth
- Protect wooden framing
- Improve indoor comfort
- Increase energy efficiency
By evaluating humidity before installation, homeowners receive a more customized solution that supports long-term crawl space performance.
| Preparation Step | Why It Matters |
| Inspect the crawl space | Finds moisture, structural, and pest issues. |
| Remove standing water | Prevents trapped moisture. |
| Repair foundation cracks | Helps stop water intrusion. |
| Fix drainage problems | Keeps water away from the crawl space. |
| Remove damaged insulation | Reduces mold and moisture retention. |
| Treat mold and mildew | Improves air quality and protects the system. |
| Eliminate pests | Prevents damage to the crawl space. |
| Check humidity levels | Determines if extra moisture control is needed. |
| Install drainage or sump pump | Protects against groundwater. |
| Final inspection | Ensures the crawl space is ready. |
Following this preparation checklist helps ensure the encapsulation system performs efficiently and delivers long-lasting protection for your home.
Crawl Space Encapsulation Terms Every Homeowner Should Know
Understanding common crawl space terminology makes it much easier to discuss recommendations with contractors and make informed decisions during the encapsulation process.
Key Terminology
- Crawl Space Encapsulation: A process that seals the crawl space using a durable vapor barrier and moisture control measures to reduce humidity, prevent mold, and improve overall home energy efficiency.
- Vapor Barrier: A heavy-duty, moisture-resistant liner installed over the crawl space floor and foundation walls to prevent ground moisture and soil gases from entering the space.
- Relative Humidity (RH): The percentage of moisture in the air compared to the maximum amount the air can hold at a given temperature. High crawl space humidity (above 60%) encourages mold growth, pest infestation, and wood deterioration.
- Sump Pump: A motorized drainage pump installed in a pit designed to collect and evacuate groundwater from beneath the home before it causes flooding or moisture damage.
- French Drain: A subterranean drainage system consisting of a perforated pipe set in a gravel-filled trench that redirects groundwater away from the crawl space foundation.
- Wood Rot: The gradual structural breakdown and decay of wooden framing members caused by wood-decay fungi thriving in high-moisture environments.
Myth: Crawl Space Encapsulation Can Be Installed Immediately Without Preparation
A common misconception is that encapsulation is simply a matter of laying down a vapor barrier and sealing the crawl space.
In reality, encapsulating over existing problems can make them worse. Moisture, mold, foundation cracks, or pest infestations that are not addressed beforehand may remain hidden beneath the encapsulation system, allowing damage to continue over time.
Proper preparation ensures that the crawl space is dry, structurally sound, and ready for encapsulation. Addressing these issues first helps maximize the effectiveness of Richmond VA crawl space encapsulation services, reduces future maintenance, and supports healthier indoor air quality.
Benefits of Proper Crawl Space Preparation
Investing time in preparation before encapsulation offers several long-term advantages.
These benefits include:
- Improved moisture control
- Better indoor air quality
- Reduced mold and mildew risk
- Increased energy efficiency
- Protection against wood rot
- Longer-lasting encapsulation performance
- Reduced likelihood of future repairs
- Greater protection for your home’s foundation
By correcting existing issues before installation, homeowners gain greater confidence that the encapsulation system will deliver reliable results for years to come.
In Summary
Crawl space encapsulation helps protect your home from moisture, improve energy efficiency, and support healthier indoor air. Proper preparation, including inspections, moisture control, repairs, mold treatment, and pest control, ensures the system performs effectively and provides long-term protection.
If you’re considering crawl space encapsulation in Richmond, VA, Tiger C Construction, LLC offers thorough inspections and customized solutions to help protect your home for years to come.
Contact us today to schedule a professional crawl space evaluation and learn how our encapsulation services can help create a cleaner, drier, and healthier home.
People Also Ask
What should be done before crawl space encapsulation?
Inspect and fix moisture issues, mold, pests, damaged insulation, and foundation problems before encapsulation.
Does a crawl space need to be completely dry before encapsulation?
Yes. Standing water and active moisture issues should be resolved before installation.
Is mold removal necessary before crawl space encapsulation?
Yes. Mold should be treated before encapsulation to protect air quality and system performance.
Should a sump pump be installed before encapsulation?
If water intrusion is present, a sump pump may be recommended before encapsulation.
How long does crawl space encapsulation last?
A professionally installed system can provide long-term protection with proper maintenance.